Integrations · Rippling

Integrate with Rippling

This article walks through how to set up and configure Klaar's integration with Rippling, including what data syncs, how often it syncs, and what to expect during setup.

Overview

Rippling is the source of truth for your employee data. Once connected, Klaar pulls that data automatically, so your performance management platform always reflects your real org. No CSV uploads, no manual account creation, no chasing IT every time someone joins or leaves.

Once Rippling is integrated with Klaar:

New hires appear in Klaar automatically

When an employee is created in Rippling, a webhook triggers a sync and their Klaar account is set up with the right title, department, level, and location. Nobody has to create accounts by hand.

Org changes stay current

Employee data syncs from Rippling to Klaar automatically every 24 hours, covering titles, departments, teams, job families, levels, employment types, locations, and more. You can also trigger a manual sync from Klaar whenever you need the latest data right away.

Departures are handled cleanly

When an employee is deleted in Rippling, their Klaar account is automatically marked as Disabled. Their performance history stays intact, but they no longer have access.

You stay in control

Before auto-sync goes live, Klaar runs a test sync so you can review exactly how your Rippling fields map to Klaar. Auto-sync only activates after you click Verify & Confirm.

Connect Rippling to Klaar

Note: You will need admin permissions in both Rippling and Klaar to complete this setup.

Part 1: Install Klaar from the Rippling App Shop

1

Open the App Shop in Rippling

From the main sidebar in Rippling, select App Shop.
2

Find and install Klaar

Search for Klaar, select it, and click Install.
3

Click Continue

On the next page, click Continue.
4

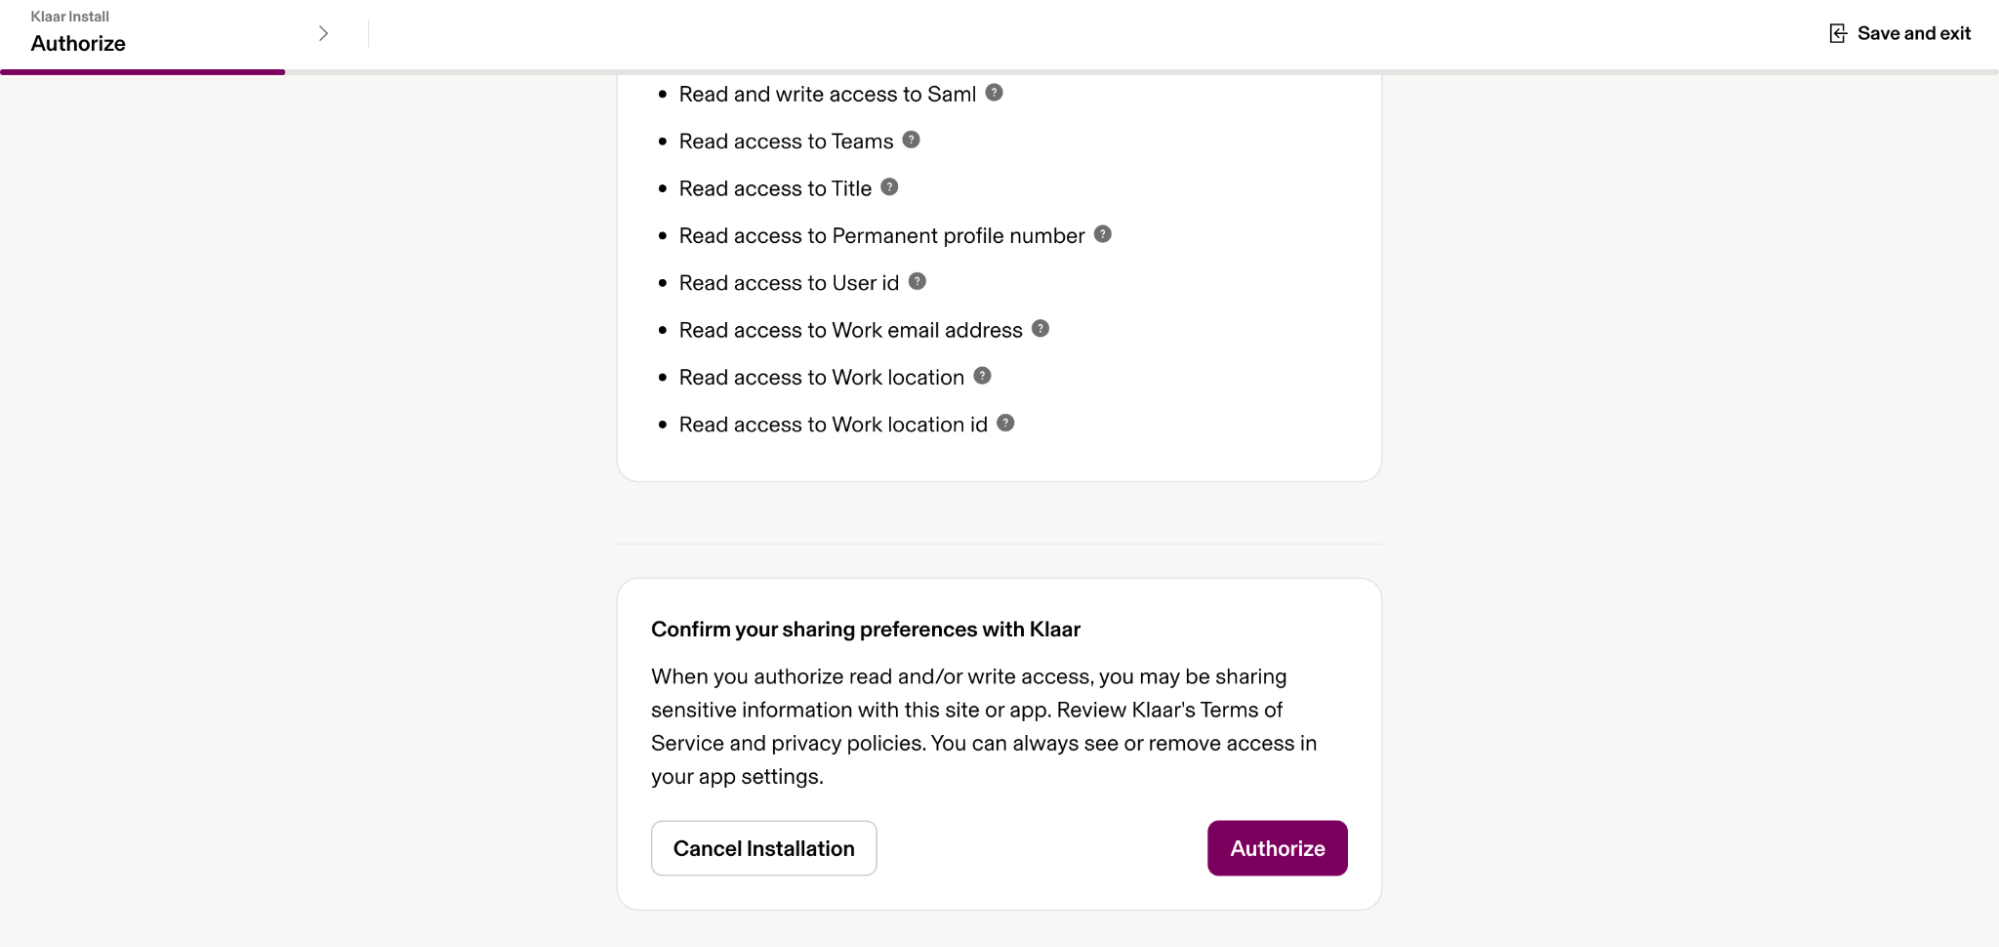
Click Authorize

On the next screen, click Authorize.
5

Select the groups to include

Choose the groups you want to include in the integration and click Continue.
6

Select the access time

We recommend keeping the default selection. Click Continue.
7

Connect your Klaar account to Rippling

On the screen that says "Connect your Klaar account to Rippling," click Continue.
8

Enter your work email that you use for Klaar

This should be the same as the email you log in to Klaar with. Once you enter your work email, it will take you to your organization's Klaar workspace.
9

Log in to Klaar using your preferred method

Your login method will depend on your organizational IT policies. It will be one of the three options you see on the screen.
10

You're redirected back to Rippling

Once logged in, you will be redirected to Rippling. The installation is now complete. Next, verify the sync in Klaar.

Part 2: Verify the sync in Klaar

11

Review the test sync

In Klaar, go to Settings → Workspace → Integrations and scroll down to the HRMS Integrations section. The integration status will show "Pending Verification." Klaar automatically runs a test sync to preview how your data maps. Click Sync History to view the test sync.
12

Review the field mapping

Click Details to review how Rippling fields map to Klaar fields. The mapping table shows which data points are being synced (name, email, title, department, and so on). If you need changes, contact Klaar support.
13

Verify and confirm

Once you have reviewed the test sync and field mapping, click Verify & Confirm. A confirmation dialog will appear. Click Confirm to activate auto-sync.
14

You're connected

Your Rippling integration is now active. Auto-sync is enabled and your employee data will stay in sync automatically. You can download synced data from the Sync History panel to verify everything looks correct.

Data Flows

What data flows from Rippling to Klaar?

The integration syncs the following employee fields from Rippling to Klaar:
Name
Work email address
Title
Department
Teams
Job family
Level
Employment type
Employee number
Permanent profile number
User ID
Gender
Identified gender
Work location
End date
Custom fields

Which direction does data flow?

Data flows one way, from Rippling to Klaar. Rippling acts as the source of truth for employee data. Klaar does not write data back to Rippling.

Can I customize field mappings?

Yes. Contact the Klaar Customer Success team if you need custom field mappings.

How do I set up SSO between Rippling and Klaar?

Contact the Klaar Customer Success team for assistance with SSO setup.

FAQs

What permissions do I need to set up the Rippling integration?
You need admin permissions in both Rippling and Klaar to install the app and verify the sync.
When does the first sync run?
The first sync starts immediately after the admin clicks Verify & Confirm in Klaar.
How long does the first sync take?
The initial sync typically takes around 20 minutes for an organization with approximately 5,000 users. The actual duration depends on the amount of employee data and the number of fields being synced.
What happens if data is changed in both Rippling and Klaar?
Rippling acts as the source of truth. During the next sync, the corresponding fields in Klaar will be updated with the latest values from Rippling.
What happens when an employee is deleted in Rippling?
The employee is not deleted from Klaar. Instead, their Klaar account is marked as Disabled, so their performance history is preserved.
Do employees need to do anything to set this up?
No. The integration is set up and managed by your admin. Employee profiles update automatically in the background.
Can the integration be temporarily disabled?
Yes. Contact Klaar Support if you need to temporarily disable the integration.
How can I check sync history?
In Klaar, go to Settings → Workspace → Integrations, scroll to the HRMS Integrations section, and click Sync History. From there, you can view previous sync runs and download sync reports if needed.
Need a hand?

Still stuck on setup?

Our team can help you get Klaar and Slack talking to each other in minutes.

Contact support